MicroPython on ESP8266: sending data to ThingSpeak
When you play with new microcontroller, first thing you usually do is driving an LED. That’s a classic “Hello World!” project for microcontrollers. That’s what I did when I was playing first time with ESP8266 and MicroPython. Let’s move on, and implement another classic project - measuring temperature and humidity with DHT22 sensor. But we don’t want to be quiet, so we are going to share this so important data on the Internet. ThingSpeak will help us with it. Let’s add a new warrior to the army of Internet of Shit!
Hardware and circuit: ESP8266 (ESP-07) and DHT22
This project is based on my previous post - Getting started with ESP8266 and MicroPython. So, everything what I described there apply here.
Also note that it may be better to use ESP8266 which has more than 512K of flash. It looks like that limited versions of MicroPython may not work well (see Problems with running MicroPython on ESP8266 with 512K).
For this project we’re going to use ESP-07 version of ESP8266. You can also use ESP-12 without any changes for the circuit below. But if you use other modifications of ESP8266, then you may need to modify a bit the circuit below.
Here is the circuit I used:
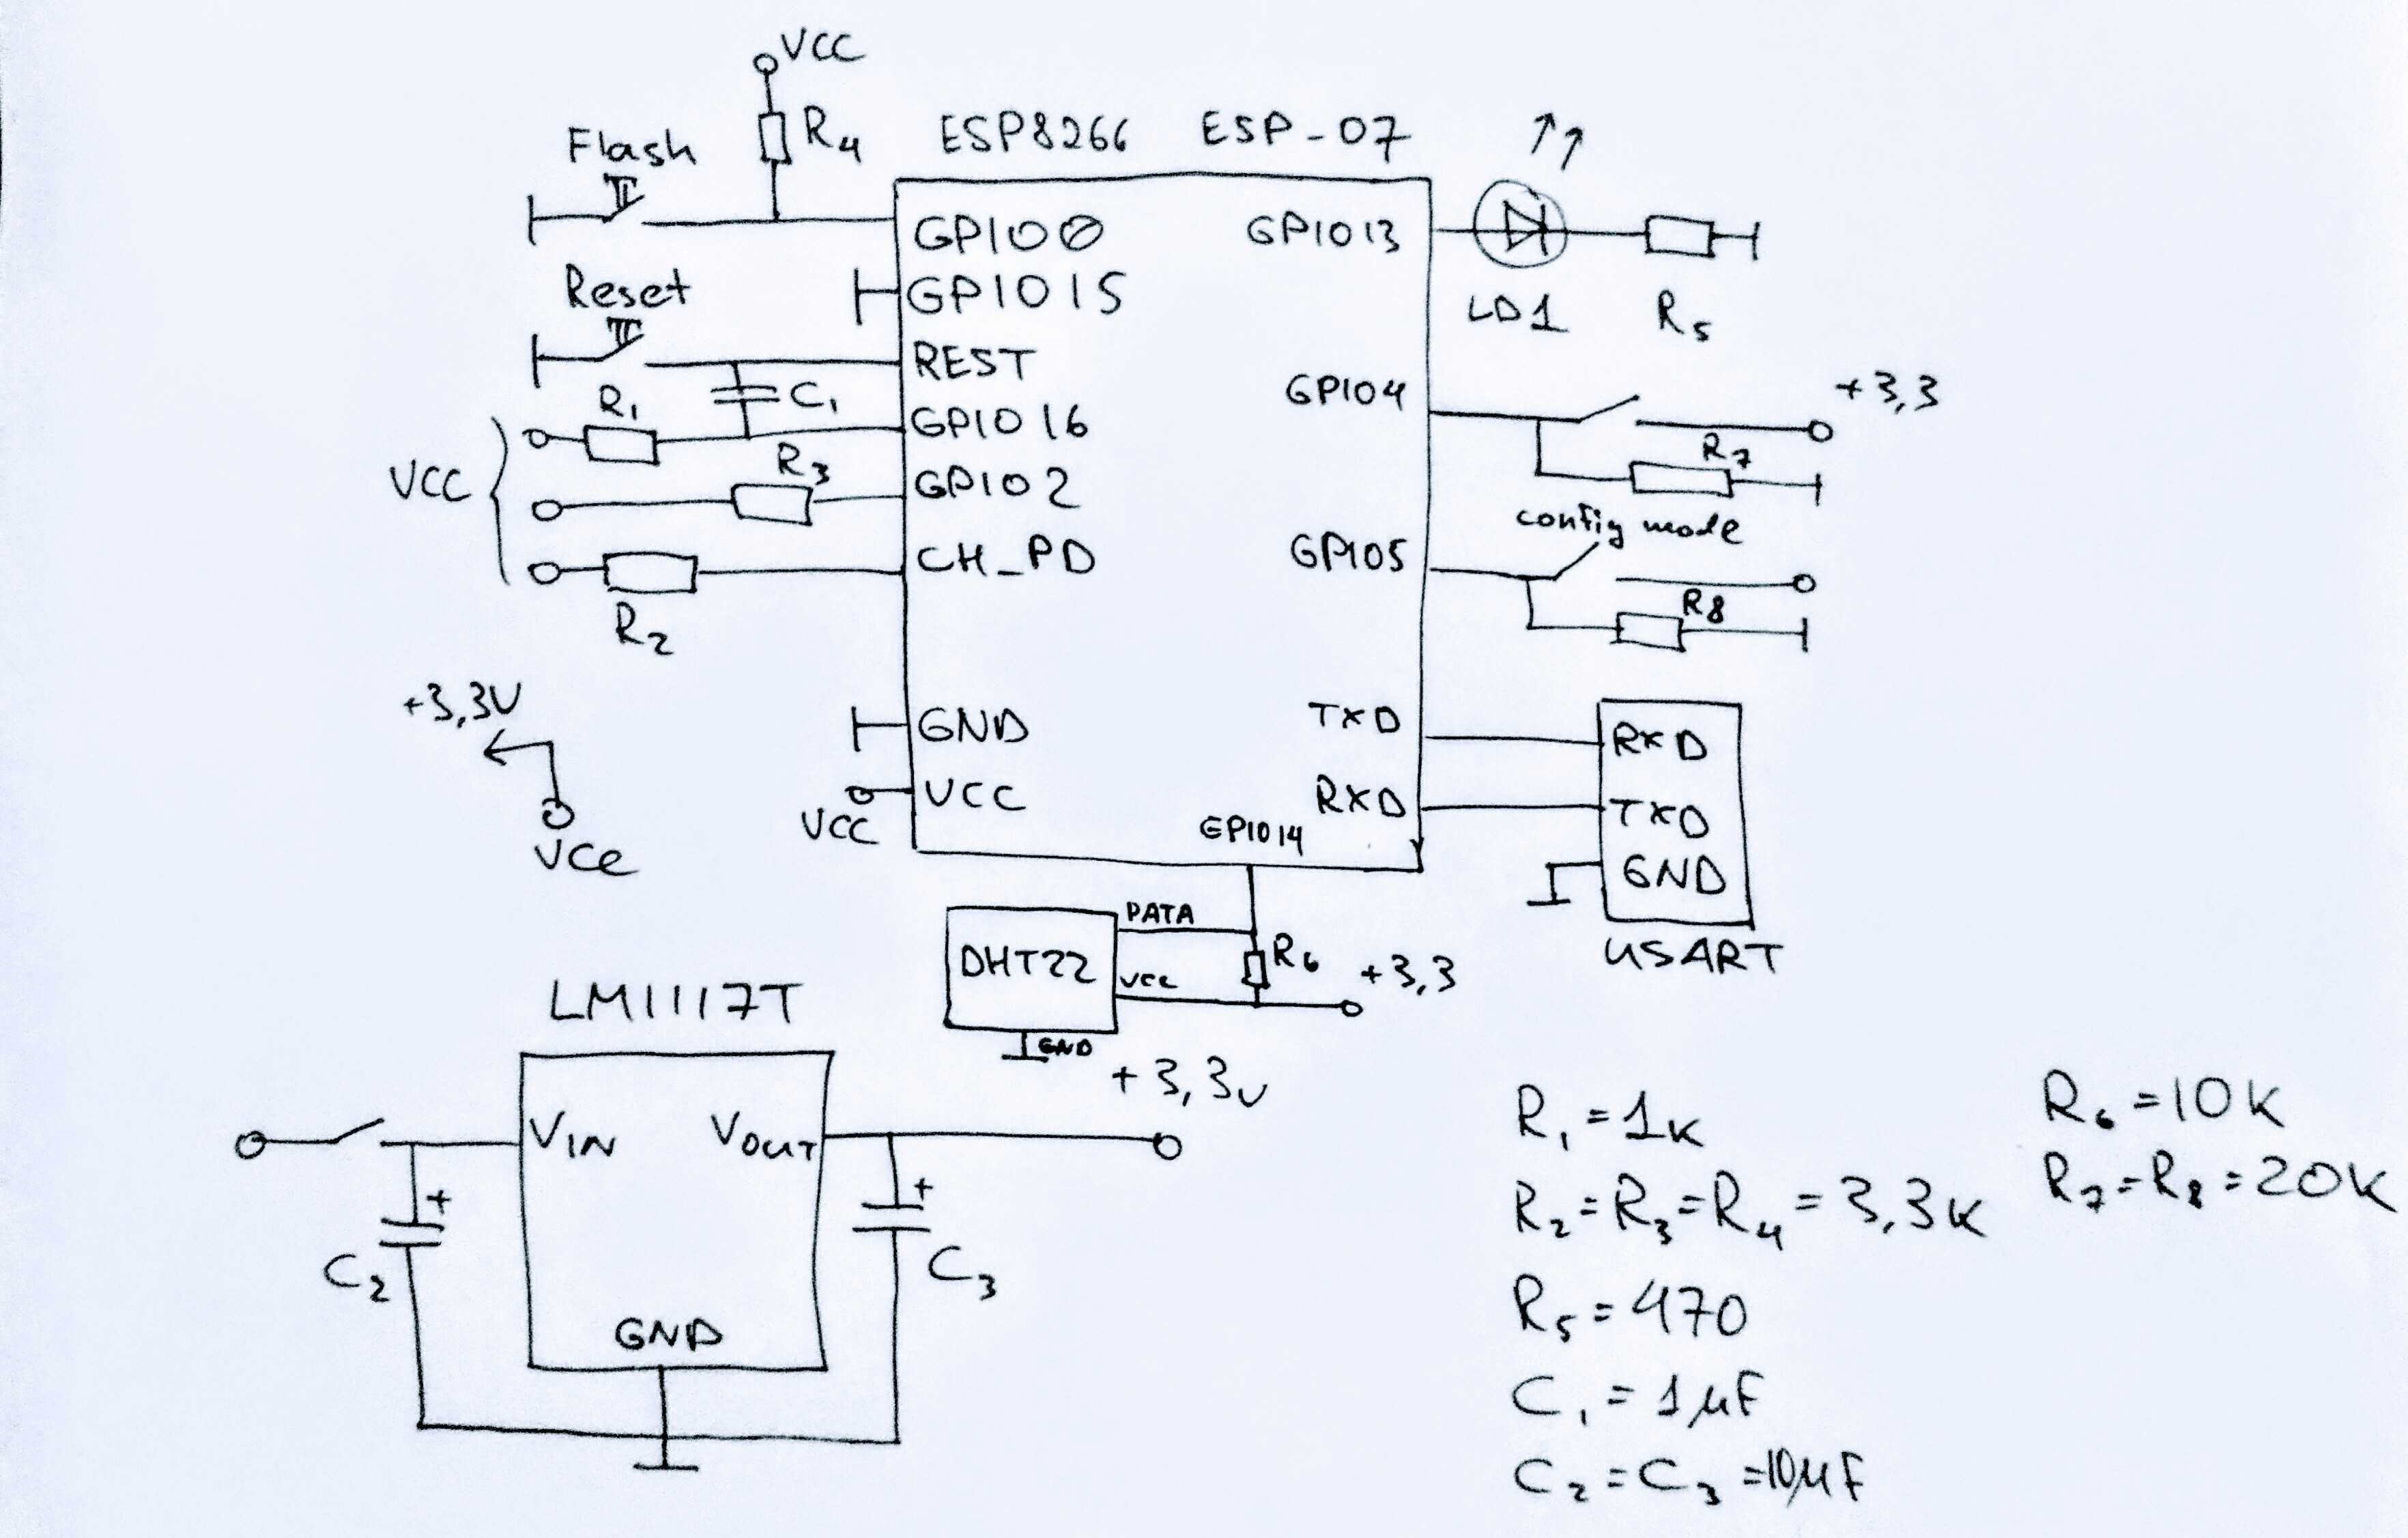
The circuit is similar to that one from my previous post. Here is what I added:
- DHT22 sensor and a resistor R6.
- A switch on GPIO5 which is used to turn on
configuration modewhich I’ll explain below. - A switch on GPIO4 which is not used. I added it just in case because I had a unit with two switches.
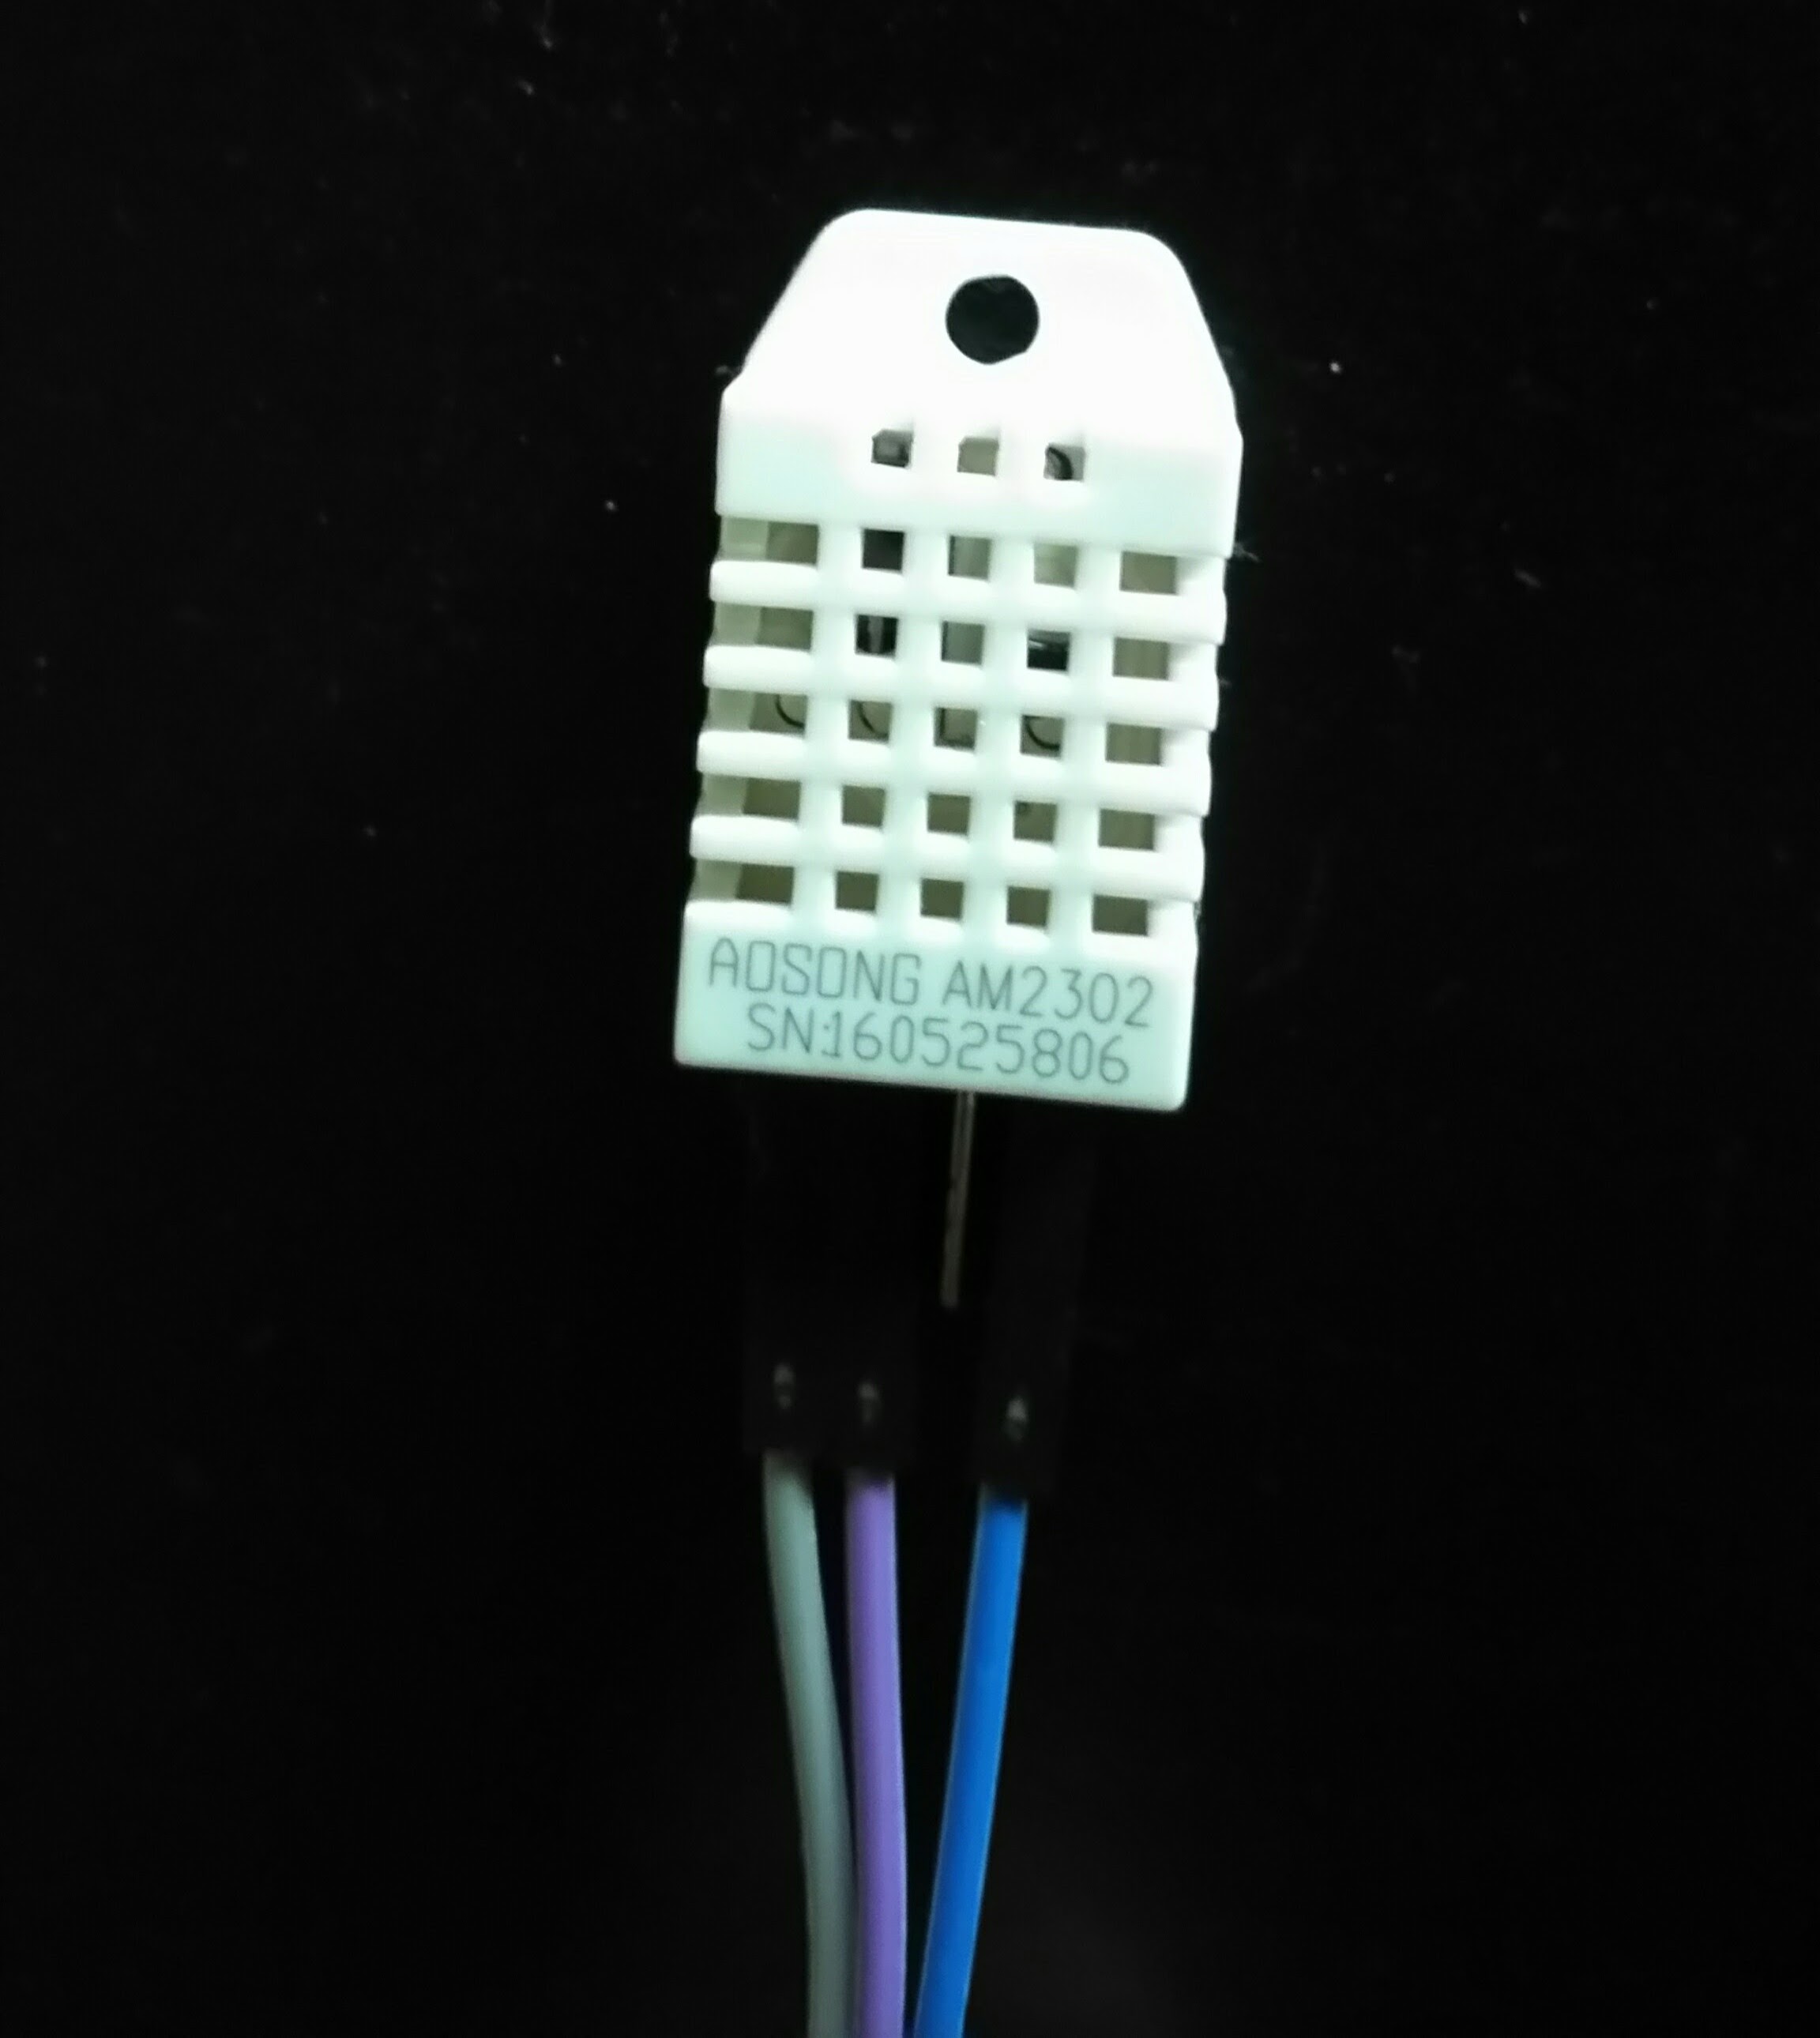
We use DHT22 sensor for measuring temperature and humidity. You can also use DHT11. That’s probably the most popular sensor for DIY projects, so MicroPython team kindly added a support for this sensor out-of-the-box. In case you have never seen this sensor, DHT22 looks like this:
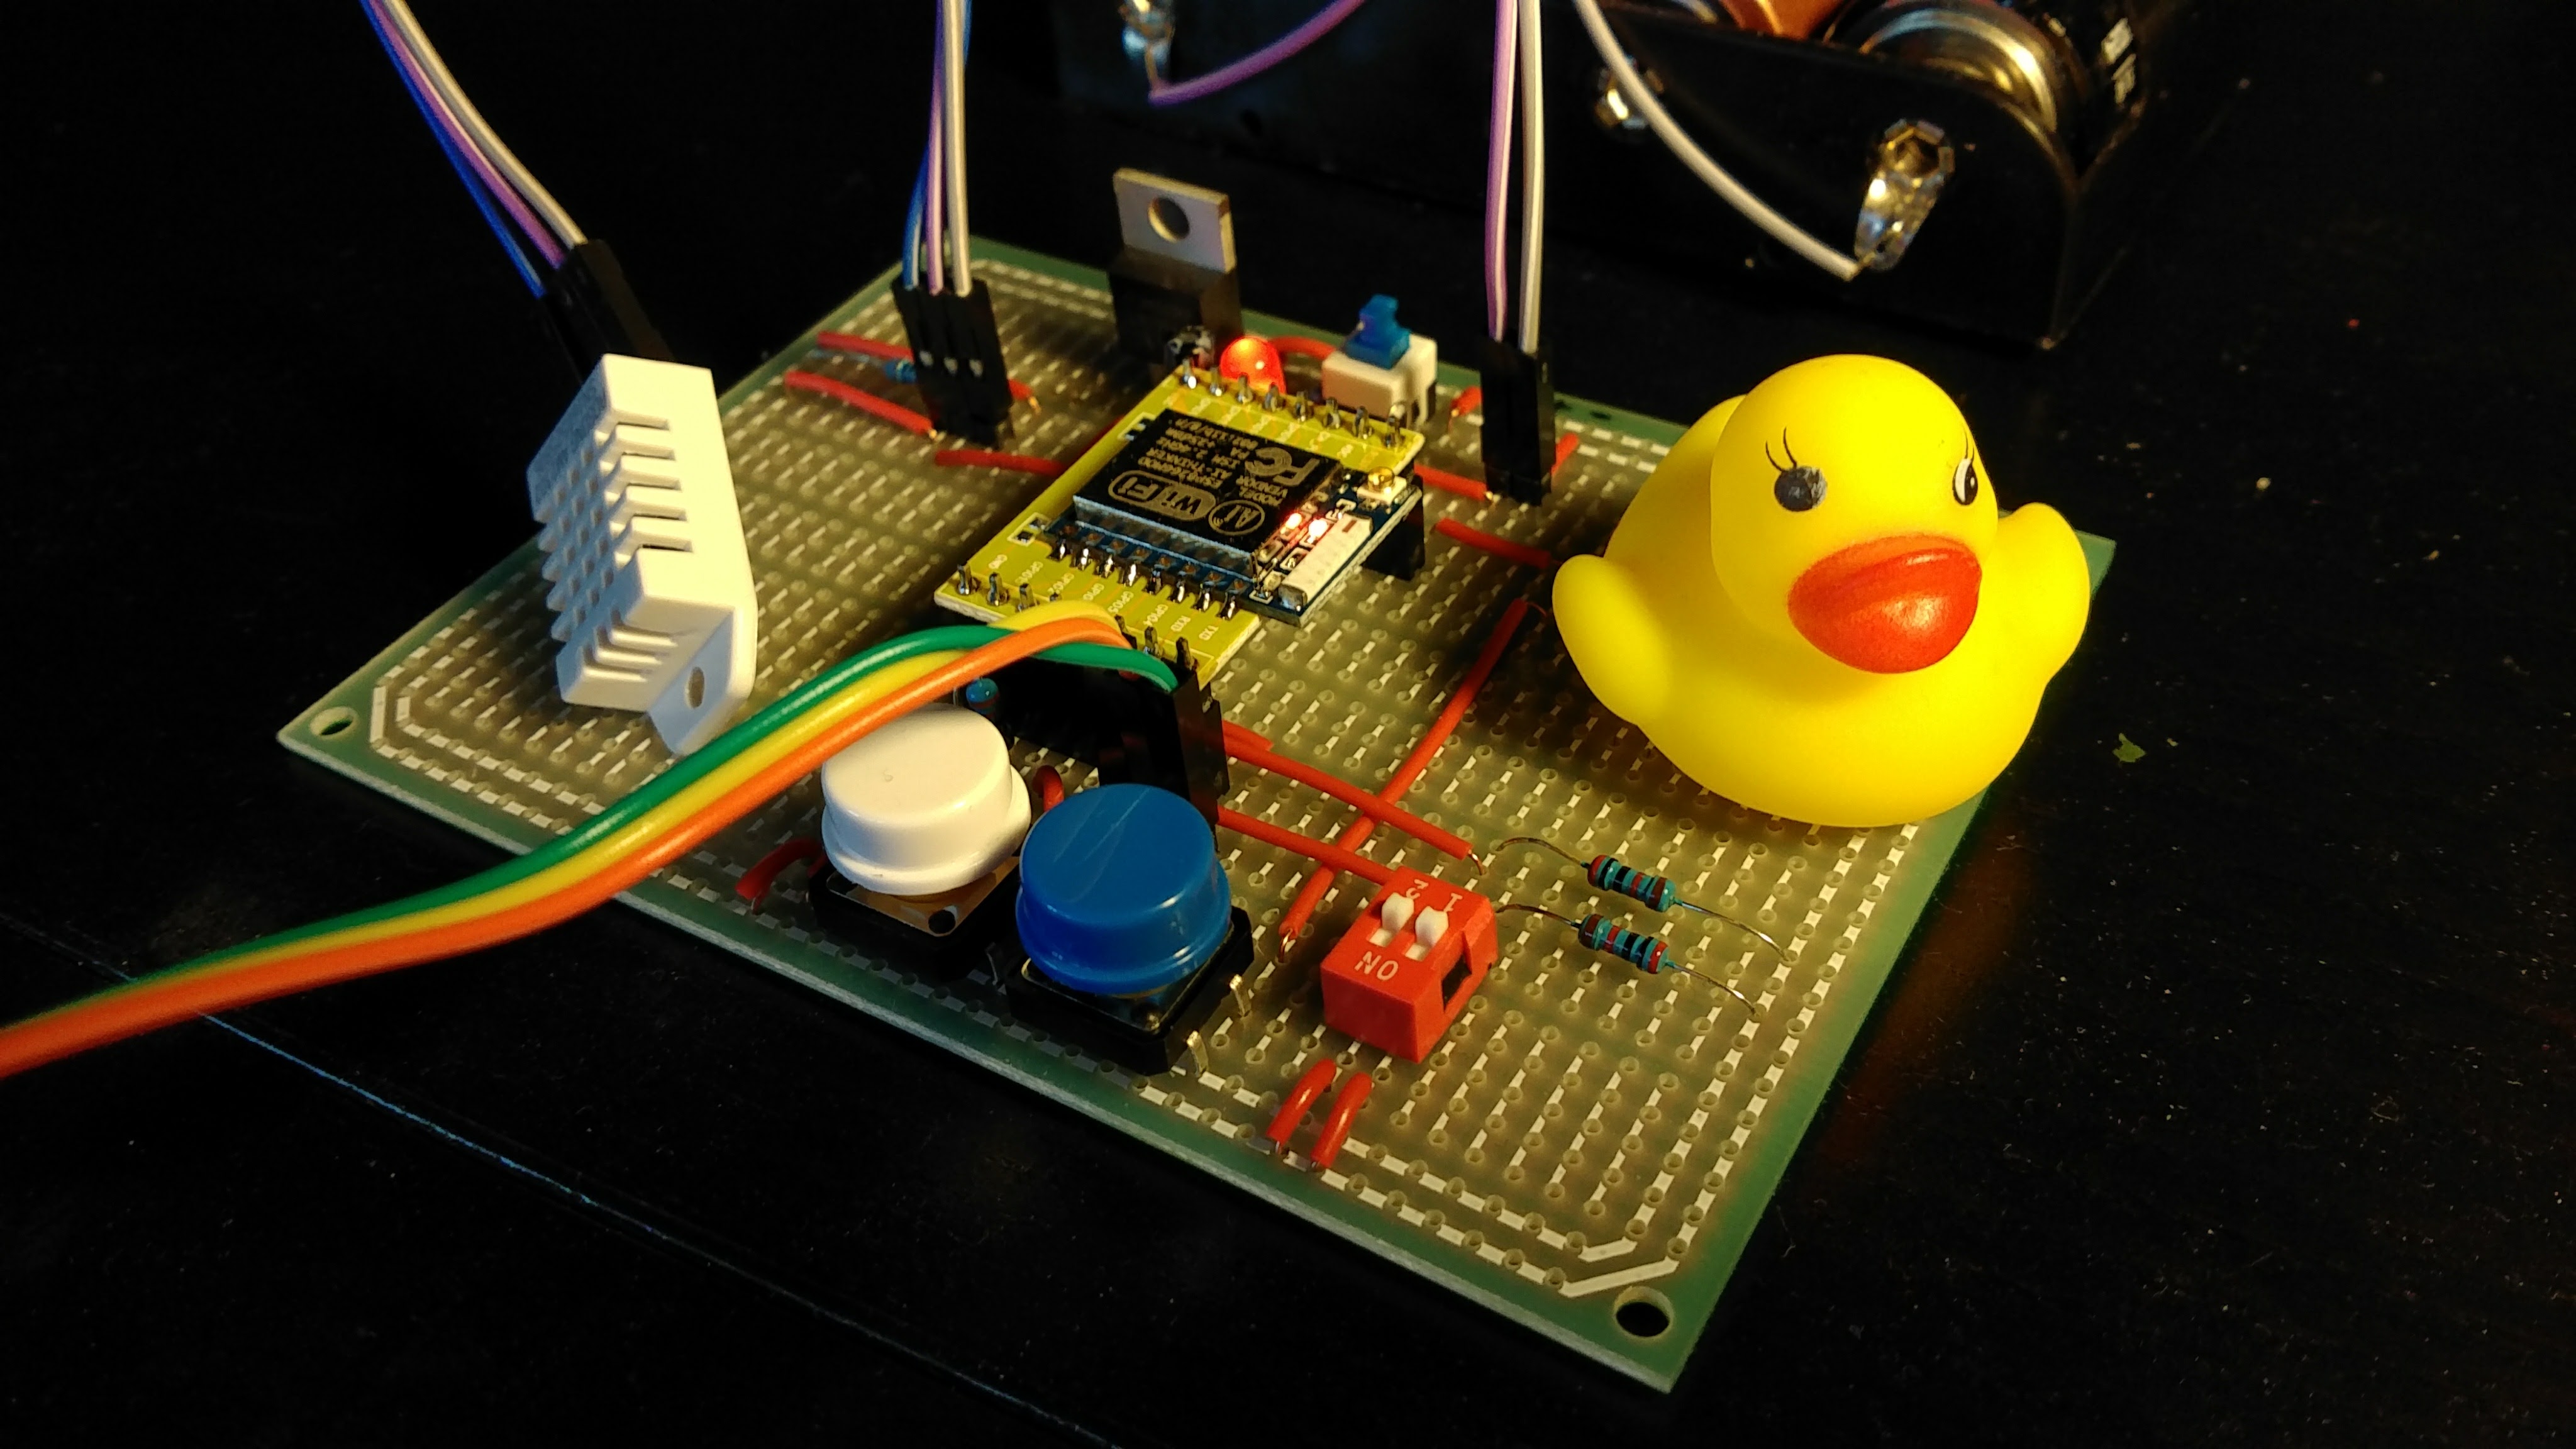
Here is how the device looks like:
Starting a Wi-Fi access point on ESP8266
We’re done with hardware, let’s talk about software. I put sources to a repo on https://github.com/artem-smotrakov/yellow-duck
$ git clone https://github.com/artem-smotrakov/yellow-duck
Since we’re going to send temperature and humidity to ThingSpeak, we need to connect our ESP8266 board to Wi-Fi. To do that, ESP8266 needs SSID and password. The most obvious way is to hardcode SSID and password. Here is how you can connect to Wi-Fi with MicroPython:
But it’s not convenient to have hardcoded Wi-Fi settings. If SSID/password change, we’ll need to change sources and upload it to the board again. Instead of hardcoding SSID/password, we can do the following:
- Add a
config modeswitch on GPIO5 (see on the circuit above) which turns on configuration mode. - When the board starts, it check if
config modeswitch is on (seeis_config_modefunction). - In case configuration mode is on, the board sets up a Wi-Fi access point, and starts a local web server (see
start_access_pointandstart_local_serverfunctions). - When a user connects to this Wi-Fi access point, the web server offers to set SSID and password for Wi-Fi network which should be used then.
- When a user provides SSID/password, the web server stores it to a configuration file on ESP8266, and reboots the board (see
write_wifi_configandrebootfunctions). - At this point, a user should also turn off
config mode. - After reboot, the board connects to specified Wi-Fi network (see
connect_to_wififunction). - In case of successful connection, it turns on LD1 (see
turn_on_wifi_ledfunction).
So, if we want to use the device in another Wi-Fi network, or we just changed Wi-Fi password, we don’t need to flash the device again.
After the device successfully connected to Wi-Fi, it starts measuring temperature and humidity with specified interval. As I mentioned earlier, MicroPython supports both DHT11 and DHT22 sensors out-of-the-box. We just use dht.DHT22 function, see mesure_temperature_and_humidity:
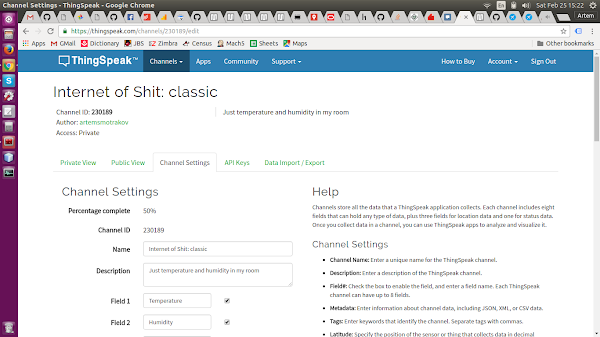
That’s pretty simple. Then, we need to send data to the Internet. We’re going to use ThingSpeak which is a nice and free platform for gathering, analyzing, and visualizing data from IoT devices. ThingSpeak provides a RestFUL API for IoT devices. First, you need to create an account on ThingSpeak. Next, you’ll need to create a channel. After that, you’ll get an API key for posting data to your channel. This API key then should be used for sending data to ThingSpeak. Don’t forget to enable two fields in your channel: one for temperature, and another one for humidity.
Here is how we send data to ThingSpeak:
We have the same problem here like we had with SSID/password - we need to provide API key, but we don’t want to hardcode it. The solution is the same - the device offers a user to specify API key in config mode.
As you might notice, we use TLS here - see ssl.wrap_socket call above which wraps a usual socket with an TLS socket. To be honest, I was surprised a bit when learned that MicroPython for ESP8266 supports TLS. But there is one thing about it. Even if TLS is used here, MicroPython for ESP8266 doesn’t support validation of server certificate (at least, v1.8.7 doesn’t support that). So, we’re relatively safe if an adversary can just eavesdrop the connection because all data will be encrypted. But if an adversary can modify the traffic, then we’re in a trouble because server certificate may be replaced with a malicious one, so that an adversary can decrypt and modify the data.
You might notice a number of print calls in the code. It’s just for debugging. You can connect to ESP8266 via USB-Serial adapter, and see those debug messages.
Visualizations on ThingSpeak
If everything went smoothly, the device will start sending data to ThingSpeak. Then, ThingSpeak allows you to visualize the data, and analyze it with MatLab. The simplest way is just to draw a chart like these ones:
These charts show temperature and humidity in my room. Here is a public channel for that:
https://thingspeak.com/channels/230189
Links
- Quick reference for the ESP8266
- MicroPython - network configuration
- MicroPython - Temperature and Humidity
- MicroPython - socket module
- Temperature and humidity module AM2302 Product Manual
Have fun!